skip to main |
skip to sidebar
This card is for Dawn McVey's colour challenge and while I thought it was a strange combo mambo - it didn't turn out so bad - challenges are just that sometimes - a challenge to see if you can do it!!

Normally, I'm a wimp and only stick to stamping and scrapping challenges, not a personal challenge like to scale Mt. Everest or run a marathon - no, not me - just so you know a bit more important information about me! lol!Don't get me wrong - I am in awe of someone who does stuff like that. I am the person who would have loved to do it, wants to have it done already, and won't ever try it.......like a said - wimpy.
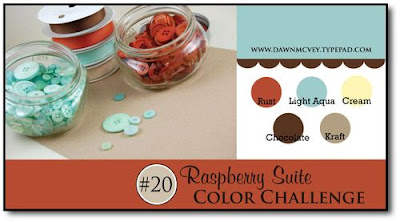 I was able to work my new October Afternoon Farm Fresh paper while making the pretty butterfly - I LOVE this paper - Gina K Designs has it right now!I stamped one of the leafs from New Leaf in Terracotta Tile - love it!! onto Aqua Mist cardstock - a little risque don't you think?
  I also used my Stamping Up Butterfly die - that I am in love with and I would definitely marry it, if I wasn't already of course,Try out this colour challenge - I think you will be pleasantly surprised!!Stamps: Communique Curves, Basic Backgrounds Retro, New Leaf (Papertrey Ink)
Paper: Farm Fresh (October Afternoon); Pure Luxury Ivory cardstock, Kraft (Gina K Designs); Aquamist, Terracotta Tile, Dark Chocolate (Papertrey Ink)
Ink: Vintage Cream, Aquamist (Papertrey Ink)
Accessories: Scalloped Punch, Bigz Butterfly Die (Stamping Up);
button, twine (Papertrey Ink)
Today's Limited Supply challenge was to use a star on your card.....limit your layers......and you could only embellish with ribbon.....not so bad no?I used the star from Waltzingmouse Stamps set, Seasons of Love and stamped it in Versamark Dazzle, onto Gina K Designs Pure Luxury white cardstock. Can I just take a minute and say how beautiful and smooth and THICK this paper is - my word......I never knew......it's gorgeous!
I embossed with detailed gold embossing powder - sorry the label is pure worn off of it, it's been rolling around in that drawer for so long! and then cut it out with the Spellbinders Star nestabilties.
The back panel was embossed with the Cuttlebug Swiss Dot embossing folder and then everything was backed onto Flourishes Metallic gold leaf cardstock that I bought a couple of years ago and then just found when I was cleaning my scrap room!!
YES I actually cleaned it!! I thought my daughter was going to fall over dead when she walked in lol!
Marcie is always the one who is at me to clean it up, keep it clean, OR she just comes over and licks everything so that I will let her throw it away - I destest tossing anything but if she licks it....well suffice to say, it's gone lol!So my new mantra is put it away put it away put it away put it away.......
I made a little Christmas house from Papertrey Ink's Home Made template and I just LOVE it!! *squeeaallllllllll!!!** I still had the Copper Craft Foil out from my wine label project so I printed off the roof accessories, cut out the dormers' templates and traced them onto the copper. Isn't it pretty
!
I also used the My Mind's Eye Paper Kit - Merry Days of Christmas for my house covering...
 This template isn't too hard to put together. I had some "doh!" moments, and some "I'm doing it this way" moments, but that is what is supposed to happen. Everytime I put it together I find a little different way to do it that is easier for me!
One of my *d'oh!* moments was when I discovered that I had stamped the window from the Home Made stamp set, upside down! eeek! and oh well.
 You can see I didn't change it, because by this time I was just wanting to finish it up and get it to the recipient - lol! It doesn't look too bad and if you didn't know any better, you would never tell the difference!
Another *d'oh!* moment is right now when I see I didn't colour the door knob!......*D'OH!!*I coloured in the windows a bit with some copic markers, to get a nice homey feeling, and then brandished them using the Martha Stewart fern punch and Zva Creative gems. I hope you like it and I am off to deliver this sweet little house! Stamps: Home Made (Papertrey Ink)
Paper: Merry Days of Christmas (My Minds Eye); Kraft, Ivory (Gina K Designs); Ripe Avocado (Papertrey Ink)
Ink: Rich Cocoa (Memento); Ripe Avocado (Papertrey Ink)
Accessories: lattice punch, fern punch (Martha Stewart); Zva Creative Crystals, Ivory Ribbon (Papertrey Ink); puff paint, Copper Craft Foil, computer
Ah yes, I am using Little Box Labels again. I don't' think I will ever tire of this stamp set. There are too many possibilities when using it.A few months ago when I was visiting Sharon Harnist's blog, I found a post about how she had made this Wine label to dress up her hostess gift, using her Spellbinders. I loved it and tried it, and I have used it often when delivering little gifts at dinner parties we have.
When Claire came out with Little Box Labels, I knew I wanted to use it, along with my new Spellbinders Labels Five die to create another elegant Wine Label for hostess gifts!
 I stamped the main image onto some Copper Craft Foil, which comes in a roll - you have tons left over to make lots of Wine Labels ;), and then again onto Rustic Cream cardstock- with Timber Brown Staz-On ink and just so you know and are not alarmed, it does stain your stamps, but it will not hurt them in any way and in my opinion they just look so wonderfully loved!
I cut and embossed both with the corresponding Spellbinders Labels Five, - nope, the copper doesn't hurt the die at all!
I inked up the edges of the Rustic Cream cardstock with Ranger Distress inks - Antique Linen and Vintage Photo.
 I stamped the snowflake onto the Rustic Cream diecut and then cut it with the Spellbinders circle die and stamped the sentiment (from Say it With Style) - and trimmed it- when it was embossed I had a small line and knew exactly where to cut!
I glued the snowflake and sentiment onto the foil with Tombow Multi glue (the green lid one) and it stays perfectly.
I used my little copper grobbletybits that I have had forever in my stash to attach to either side of the label and then attached a copper brad to keep it there.
I threaded red ribbon through, wrapped it around the bottle and tied a bow!. You could do so much more with the presentation - larger bow with silk ribbon - add a little poinsettia flower - lots of possibilities!
Just a sweet little gift to take to a housewarming or your next Christmas party - although I won't be giving away my Featherstone wine - that was a gift and we plan to enjoy that ourselves ;)!
Stamps: Little Box Labels, Say it with Style (Waltzingmouse Stamps)
Paper: Rustic Cream Cardstock (Papertrey Ink)
Ink: Vivid Brick Red (Gina K Designs); Antique Linen, Vintage Photo (Ranger)
Accessories: Labels Five, Circles (Spellbinders); Pure Poppy ribbon (Papertrey Ink); Red Bauble (Stamping Bella), Tombow Glue
Good morning! Just to let you know, today is the last of the sale at Little Paper Shop so be sure to hop on over and grab what you need! With sets marked down from 10% off to 70% off, they are perfect for those last minutes Christmas gifts!
For this week's LPS Challenge, we have a GREAT sketch from the fabulous Cindy Haffner! Hop on over to the Little Paper Shop blog to see the sketch and what you could win if you participate! Okay, my card is different than my card on the Little Paper Shop preview that I showed. I didn't like the blah-ness (new word) of that card so I thought if I added a little more colour around the edges it would perk it up - I LIKE it a whole lot better!
For today's sketch I chose to use Little Paper Shop's {Sugar}, t
hat little (huge!) cupcake is so easy to paper piece - I love using it!I stamped the cupcake onto Melon Berry cardstock, onto white cardstock and onto designer paper- I do not even know what the designer paper is - sorry! I ran the white cardstock through the Swiss Dott cuttlebug folder before I cut it out and then adhered it to the Melon Berry along with the cupcake base.
 I had fun using some of my Spellbinders dies for the frames and then put it all together! The sentiment is from {Birthday Surprise} and I love how it is kind of a childraen's font - so fun and happy!By the way - did you see my new watermark? I got them from Karen Giron and she does a FAST and wonderful job!
I had made my own for the Splitcoast Dirty Dozen, but naturally I forgot how and after fiddling around for an hour I decided to call on Karen and I indulged and got FOUR of them. For $2.00 a piece they are a bargain - something I don't have to think about doing YAY! Thanks Karen!! I LOVE them!!Stamps: Little Paper Shop
Paper: Melon Berry, Stampers Select White, Hibiscus Burst (Papertrey Ink) unknown designer paper
Ink: Memento black and Rich cocoa
Supplies: Labels Nine, Inverted Scalloped Circles, Circles (Spellbinders), Apron Lace Punch (Fiskars), Papertrey Ink button, Zva Creative crystal, Swiss Dot Cuttlebug folder