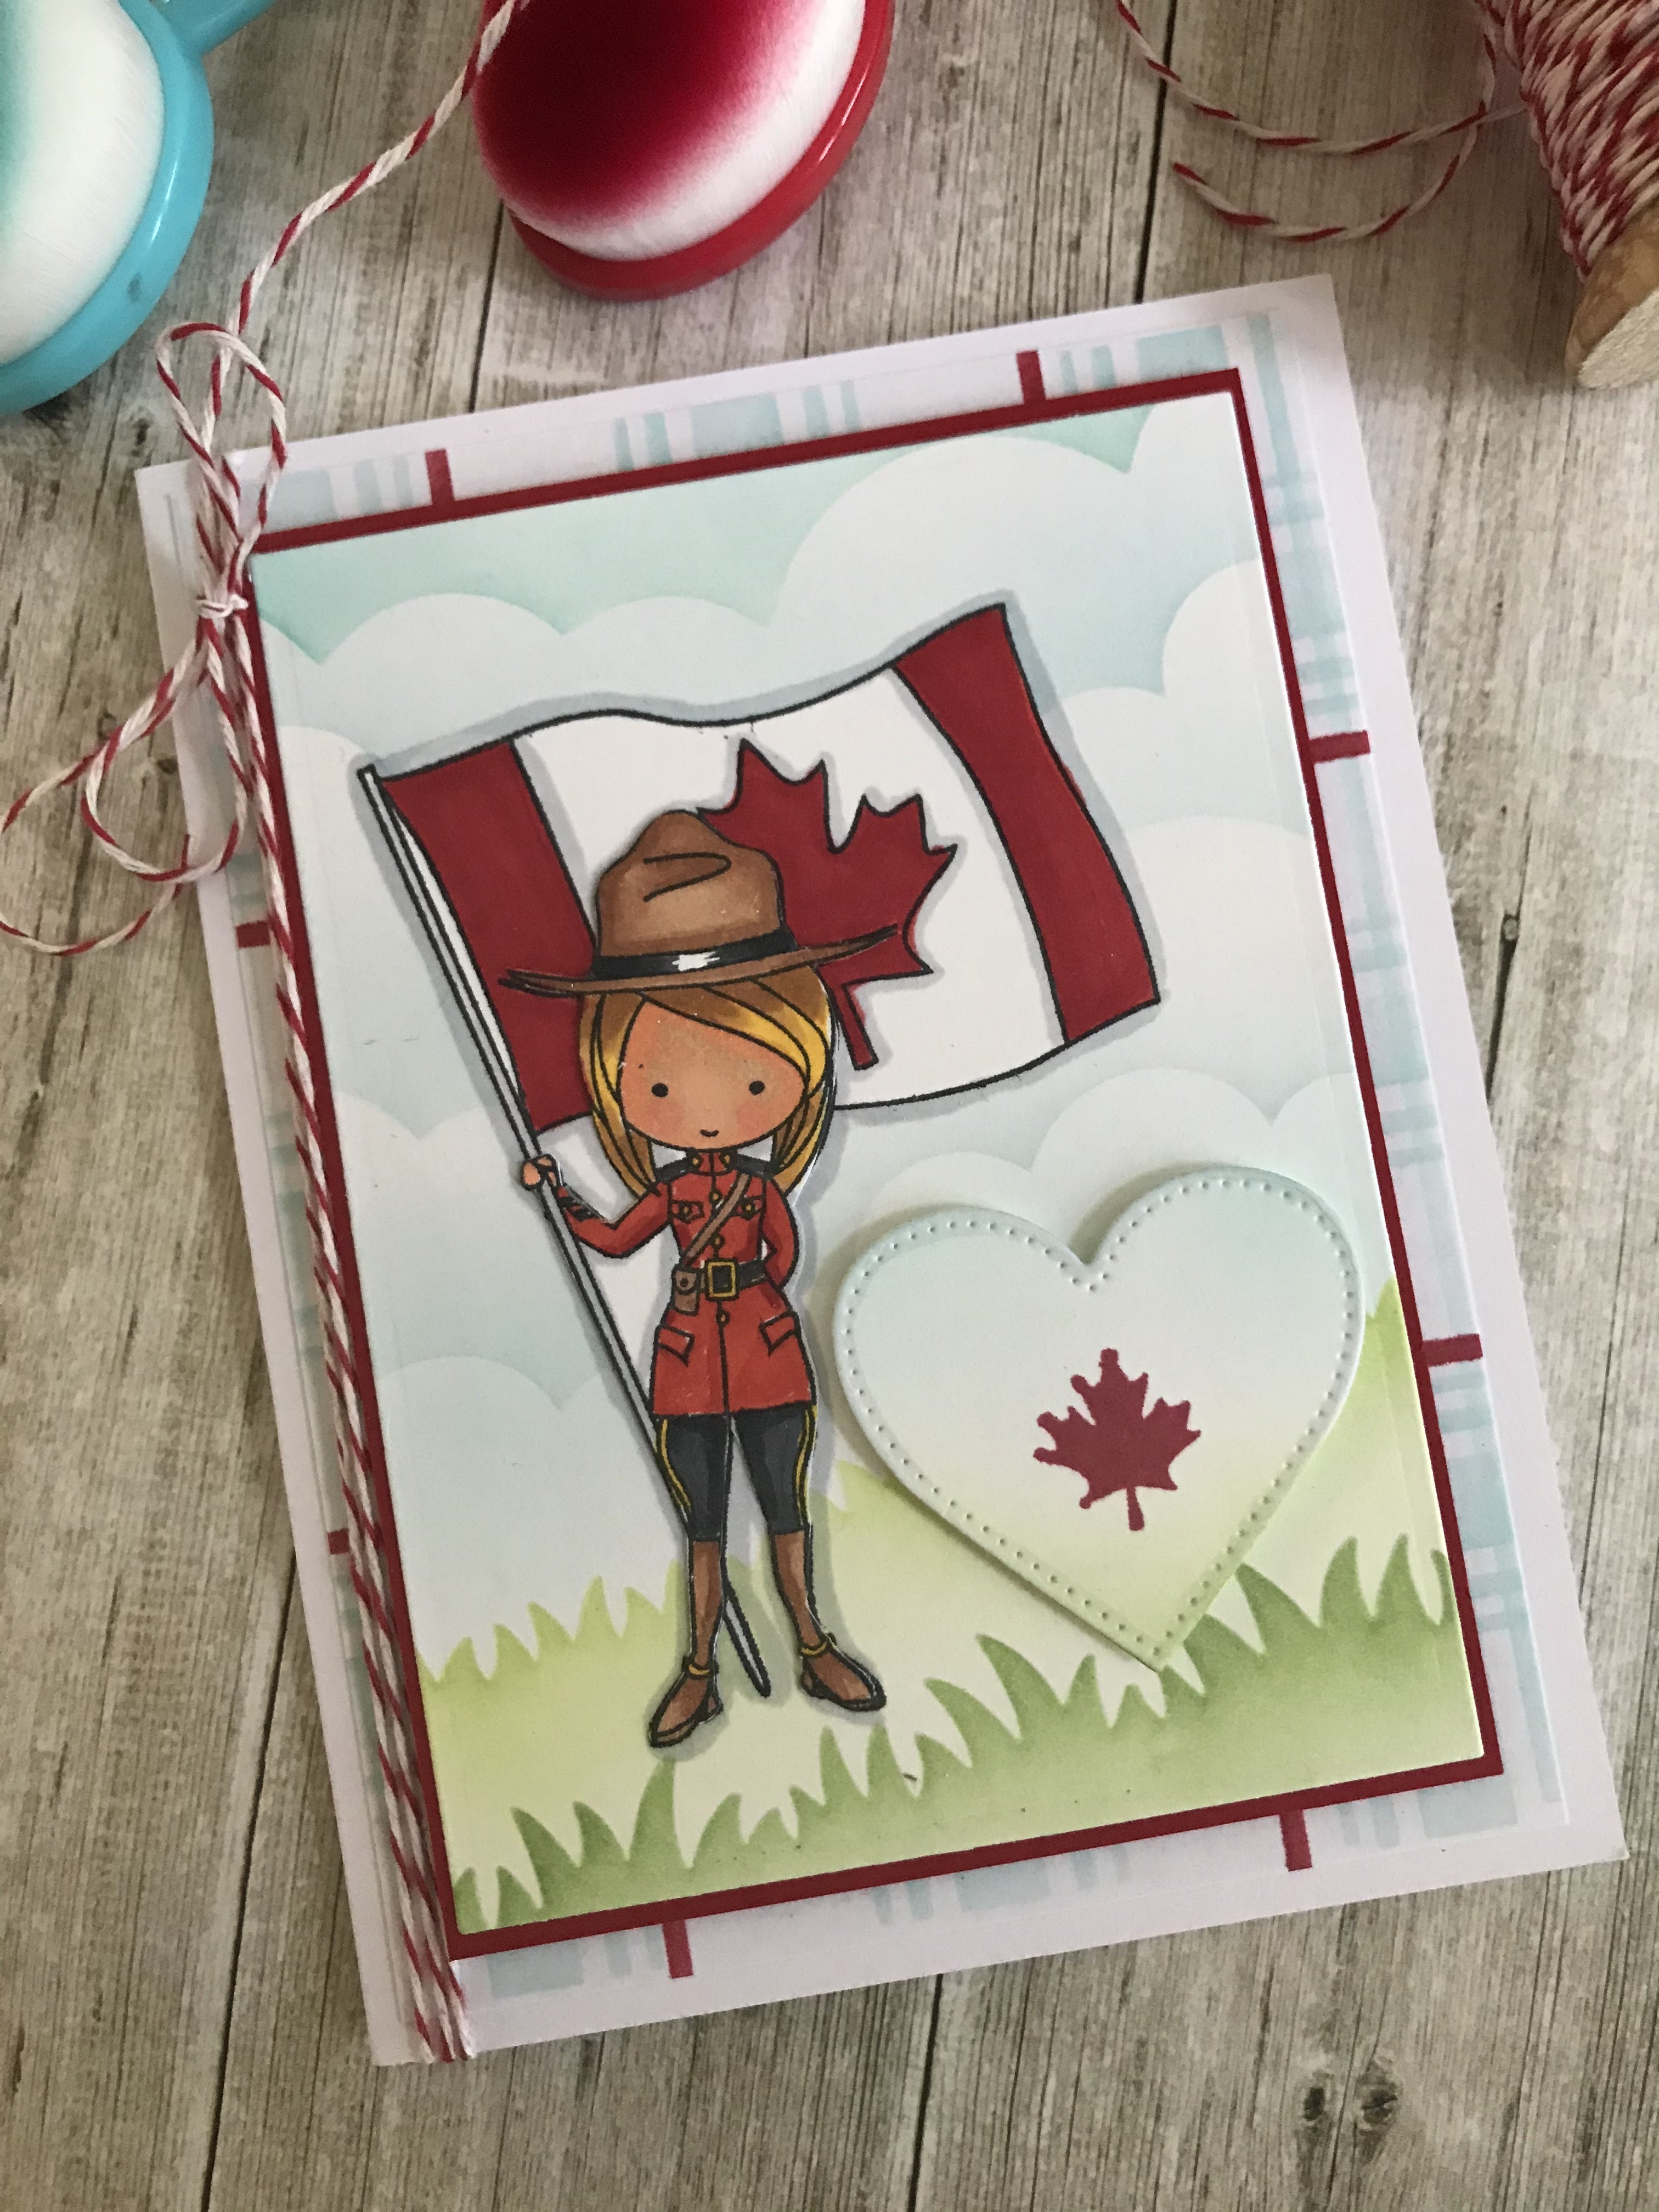
Nov 11, 2009

An Old Friend....

I just love this Sewing Box - Hugs stamp set from Waltzingmouse Stamps! I made this card for the colour challenge on Splitcoaststampers and one lady even commented on how lovely my stitching was - it's very real looking!


The colours were Very Vanilla, Kraft and Bravo Burgundy - of course you can use any colour that is similar so I used Gina K Pure Luxury Soft Sand and Papertrey Ink Scarlet Jewel and Rustic Cream.

I stamped three hearts on the Soft Sand cardstock and then again on Rustic Cream Cardstock.

I cut out the middle hearts from the Rustic Cream and adhered them to the Soft Sand cardstock and then added some Scarlet Jewel buttons tied with
Rustic twine.

I love the sentiment and I must say that a couple of years ago an old ....no.....good friend, that I went to Grade School with, some er......40 years ago contacted me through Classmates.com. I was thrilled to say the least!

We met for lunch with a few of the other girls from school and they are all so beautiful and fun and so dang grown up! Now we get together once in awhile to laugh and share funny teacher stories
. I think it is about time for another get together - eh Jayne?!!


Nov 9, 2009

Little Paper Shop Challenge!

Good morning and happy Monday!

The sun is shining and I am going over to my daughter's house to stamp yay!


Today's challenge is a sketch challenge that you are most welcome to play. Hop on over to the Little Paper Shop blog to see the details and what you can win!!


I used UTEE (ultra thick embossing powder) on my Merry and Bright star to make a cracked glass technique.......Heather has a fabulous tutorial on how to create this antique-y look - and that is what I used for my image. I love this technique! Thanks Heather for making it so easy!!

Nov 8, 2009

Cupcake Inspiration Challenge #32

Good Sunday morning and welcome to another Cupcake Inspiration Challenge! This week we have another delicious looking cupcake to be inspired by!

Every week Rachel Hope, from Hope Stamps Eternal, uploads a fabulous cupcake and our design team is totally inspired (because we are like that !) and we whip up a card to totally inspire you!


So here is today's cupcake......


and here is how I was inspired.


I used Basic Grey June Bug designer paper and a stamp from my new Bella Blvd Camp Out stamp set- I love this little motor home. My in-laws sold motor homes for years and this sweet set brings back a ton of memories!

I am using this as a retirement card and on the inside the sentiment is "Happy Retirement" (original, I know)......

My trail of "dust" is one of those fabulous Zva Creative flourishes in Jet. So you see how it hangs off the edge of the card? Just make sure if you do this, that you put a bit of baby powder on the back of the sticky part - so that it won't be sticky! a fabulous tip I learned from the wonderful Kim Hughes right here! and then be sure to use a larger envelope so the gorgeous crystals won't fold over and be all yucky.....as my grandson would say....

Don't forget to drive around to the other "Sweeties" blogs and check out how they were inspired!! AND since we are saying good bye this week to the most awesomest Tammy, we have a new member of our design team and that is Teresa Kline! Welcome Teresa!!

Carolina - Carolina's Creative Pad
Rachel -
Hope Stamps Eternal
Colleen -
Glitter Ink
Michelle - Stop and Stamp the roses

Natalie - dougnat diaries
Jessica - Shamrocks and Seashells

Kelli - Yard Sale Kind of Luck

Teresa - Enjoy the VA Sunshine


Nov 6, 2009

Home Sweet Home....

I finally received my Waltzingmouse Stamps in the mail yesterday and of course I inked them up
immediately..... I want to have fun like the rest of
the Design Team!

I received the set Sewing Box - Hugs and decided to make a card with a frame of sorts.


I stamped the house onto Rustic cream cardstock with Memento Rich Cocoa ink and coloured it with copics.

I added some Zva Crystal gems to the windows and highlighted them with a gold Copic spica pen, hoping they would look like candles that had
been lit and make it all comfy and cozy (how'd I do?.....)

I didn't colour the door because honestly, I didn't really know what colour to make it! That is so true......if I went with blue - it would be too much, if I coloured it green - I don't know..... green didn't seem like it at the time, but now it looks like it woul
d have worked....oh my.....light brown may have done it too.....decisions, decisions......any suggestions? (Hey, I know I should be the one that can figure out what colour a door should be, but today I just can't lol!)

I love the new Basic Grey Nook & Pantry, it is so homey feeling, so I used a sheet of it from a 6 x 6 paper pad for my frame and background.

Using my square nestabilities I was able to cut squares from the middle of my measured piece of Nook & Pantry designer paper and Ocean Tides cardstock.


I glued those pieces together and then added dimensional foam tape to the back of the "frame" and added it to the cardbase that already had been p
repared with the sweet little home image.

Using the Spellbinders Fancy Tags I stamped the sentiment and popped the tag up onto the bottom of the card.

I added a bit of Vintage Cream ribbon with a button tied with coloured twine to finish it off!

This set, along with two other gorgeous sets have been released already at Waltzingmouse Stamps. One of the stamp sets is a TOP SECRET and you even need a secret password to enter the secret blog to see the secret set! How secretly FUN is that?!

I'm off to a craft show today to spy to see how people set up their tables and to probably to buy stuff! yay!